
In my last post I emphasised the importance of the right materials and I'll repeat myself here. This is a really simple doll and it's beauty relies on good quality felt, stuffing and interlock. They are small and don't use much in the way of materials so for the differential cost it's a no brainer. If you are stuck for suppliers please let me know.
Materials you will need:
Good quality wool felt, preferably hand dyed
Flesh toned pure cotton interlock (T-shirt material)
Wool stuffing (probably about 10gm for each of these dolls)
Regular sewing thread (matching or contrast as you like)
Scissors Paper for marking out a pattern
A stuffing stick (I use a chopstick or whatever else is handy)
Pins and needles
Optional decorative elements such as teeny tiny buttons, embroidery floss, teeny tiny bells, wool for hair
1. Cut a pattern for the body

I have given you a pattern as a guide, but please - it's only a guide! When you've made a few you will be cutting them out freehand I promise. And these are for little dolls (10cm/4 inch), but you can make them in any size at all. The top pattern is for a standing doll with a flat base. You'll need to cut a circle of felt and a slightly smaller one of cardboard or something stiff to put on the inside to stop the stuffing bulging. Because it will all be blanket stitched on the outside you don't need to worry about seam allowances.
2. Cut out two body pieces from your felt for each doll
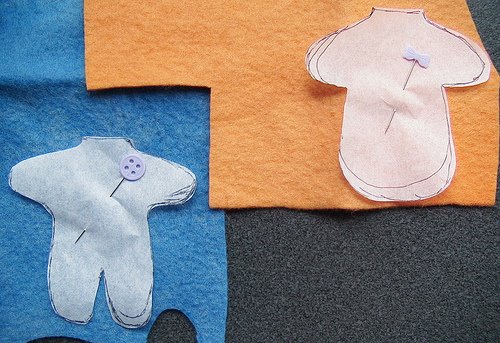
I won't lie to you, cutting can be tiresome. The thick felt doesn't like sitting flat with pins so I tend to cut one with the pinned pattern piece and a second using the first as a guide since the felt sticks together without pins. But don't stress, these dolls are all about handmade so precision is not the name of the game.
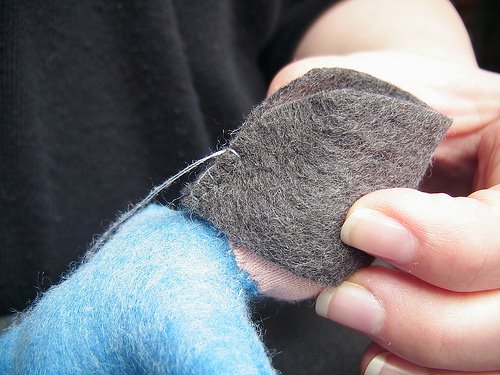
3. Make a head sleeve from the interlock
I won't lie to you, cutting can be tiresome. The thick felt doesn't like sitting flat with pins so I tend to cut one with the pinned pattern piece and a second using the first as a guide since the felt sticks together without pins. But don't stress, these dolls are all about handmade so precision is not the name of the game.
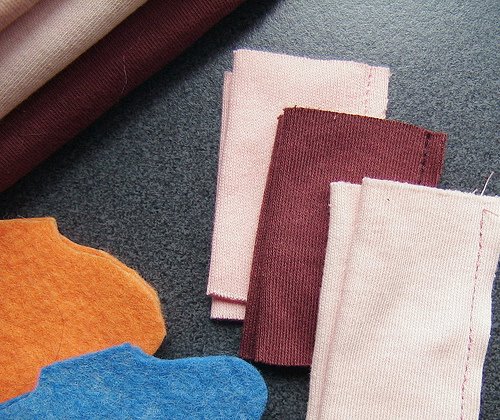
Using the flesh coloured cotton interlock make a small sleeve for your head. You want it to be about 5cm/2inch long for this size doll, and when sewn, about 2.5cm/1 inch wide (wider than the body neck hole, but not as much as one and a half as wide). If you have a machine handy that's fine, if not a hand sewn back stitch seam is fine too (you won't see this seam later).
4. Embellish your bodies if you want
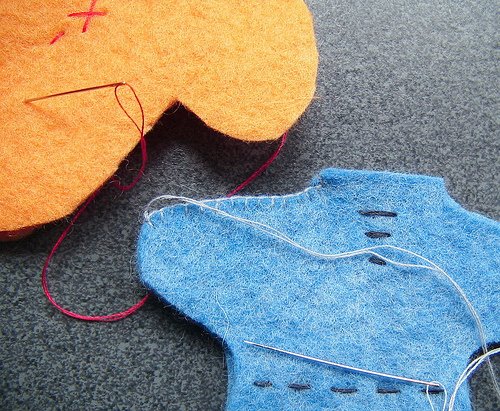
Remember these guys are meant to be simple - a few stitches to imply buttons (or if toddler safety isn't an issue some actual tiny buttons), a simple flower or a star is enough
5. Blanket stitch around the body leaving the neck open
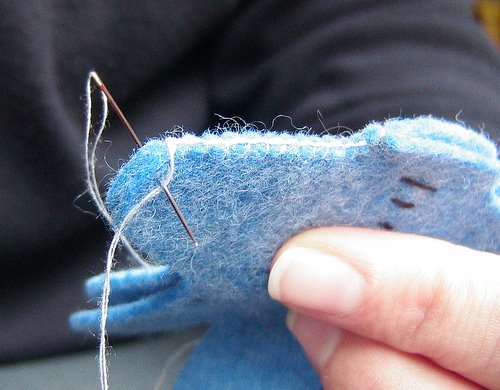
If you don't know how to blanket stitch, which is not a hard stitch at all, try here for some instructions. They call it button hole here, but it's the same stitch.
6. Stuff your body
Get into the limbs first and then the body proper.
7. Keep on stuffing

Stuff hard to the brim and then stuff some more. These guys need to be plump and firm and they will compact a bit. Leave just enough of a hollow in the neck to get the head in.
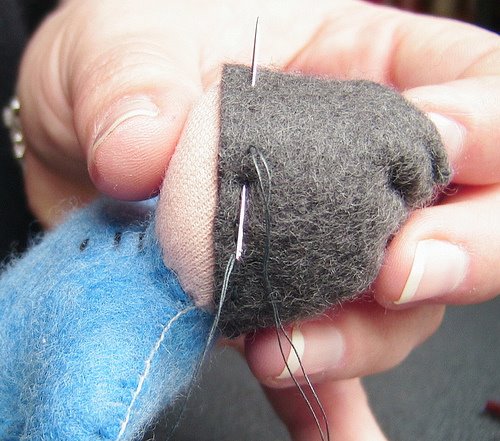
8. Close off the top of the head sleeve
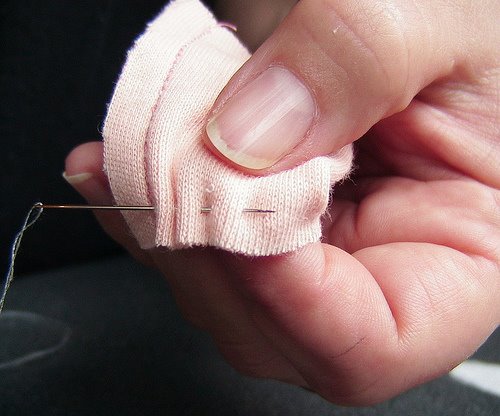
Put a running stitch a few mm in from the top edge of your sleeve,

gather in tight and tie off securely.
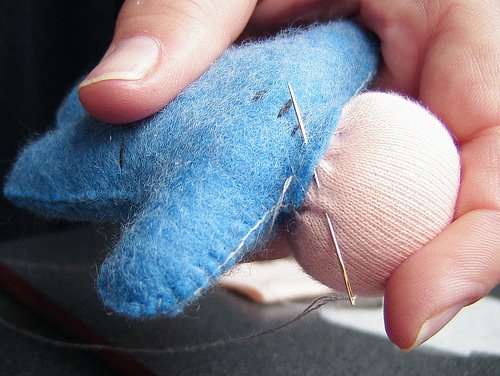
9. Turn the head inside out and then stuff

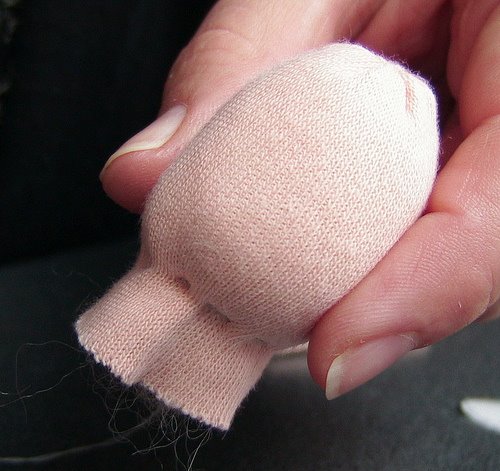
Use another running stitch to hold the stuffing in place, making sure the head is really firm and well stuffed. Soft is not good.

Add another running stitch above the first - this will form a neck for the head and make the head stuffing even firmer. This neck stops the head to neck join being weak and floppy. Sorry about the crap photo!
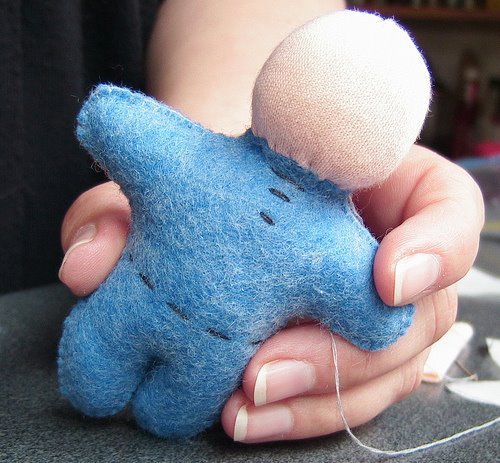
10. Push the head into the neck hole and sew in place
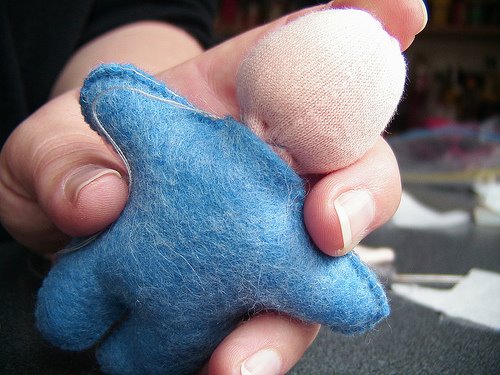
If both the head and body are well stuffed this will require some force. I often use the stuffing stick to really push it in amongst the body stuffing. The deeper into the body you can get the head the better the neck join will be.
Stitch head and body together. You can use any stitch you like to do this, so long as it is strong and relatively even.
Your basic doll is now complete!
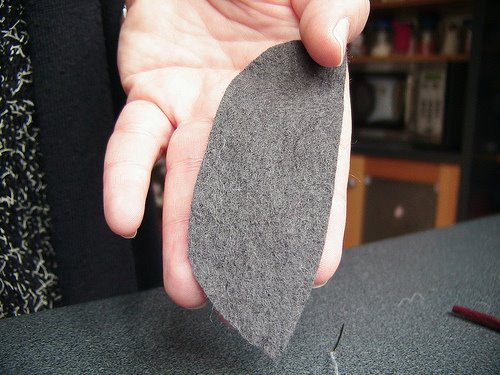
11. Cut a hat
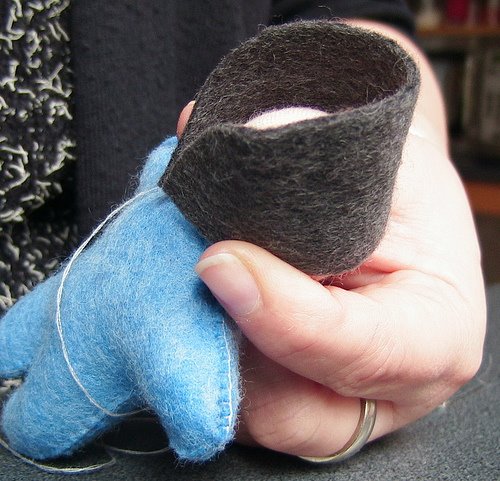
There are no limits to the different styles of hats you can make. This is a basic one I use a lot. Measure the circumference of the head from front forehead to the nape of the neck, with enough height to cover the head. You'll end up with a shape something like this.
12. Sew up and attach hat
Use blanket stitch from bottom edge to top point of hat

then back stitch down the seam, pulling in to gather as you go.
Back stitch around the hat rim, securing to the head.
13. Other possible adornments

You might want to add a little bell to the top of his hat.

Steiner dolls are traditionally faceless, though you can add a little stitch on either side of the face to imply eyes.
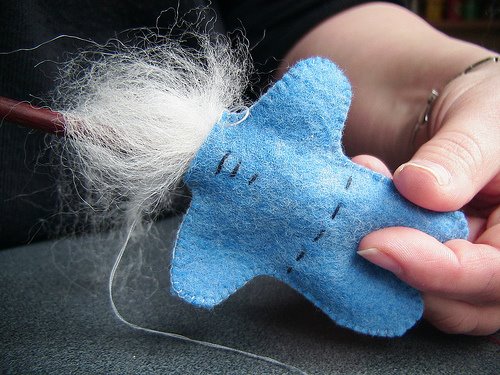
14. Hair

You may want to add hair to your doll. Like hats, hair has endless variations, Carded or uncarded fleece, silk fibre, knitting yarns all make excellent hair and can be left as loose flowing locks, trimmed short or tied in bunches or plaits.
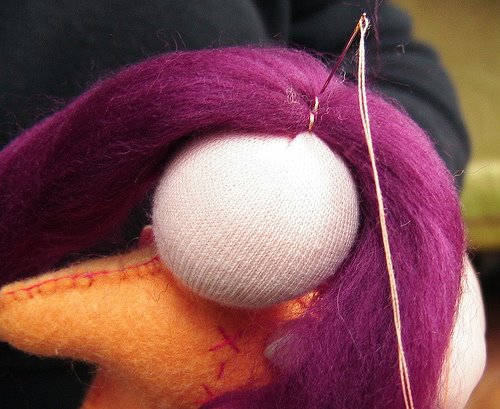
Attach wool to head from crown to nape with secure stitches.

Plait hair and tie off using a needle to pull thread through the fibres to ensure ties don't slip off.
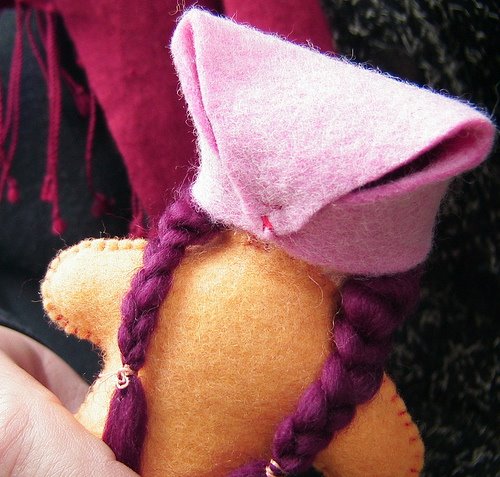
Attach hat, in this case a kerchief style using the same basic method as the hat above but instead of a curve above the head, taper sides to a point.

And both your dolls are complete.
15. Get carried away

A sleeping bag or wrap gives your doll another dimension, and children love them! You can make a sleeping bag from felt, knit or any other fabric at hand.
And yes, I'd love to create a Flickr gallery for Steiner dolls if someone will tell me how!
Postscript: Yes, there's now a Flickr Group for Steiner dolls so head on over, take a look and make sure you post pics of what you've done. Suse also left a great suggestion about the flesh coloured interlock. If you have an old white T-shirt or singlet that's cotton, you can dye it in tea until you reach your prefered flesh colour. This is a really good idea as the flesh interlock can be hard to get and a bit pricey.


7 comments:
Sweet little dolls!
Could you make these with something other than wool? Me and my little guy both get hivey if we go near the stuff. Any suggestions on materials we might use instead?
Thanks!
not sure.. anybody?
It's pretty tough to substitute wool. Cricket and I have been emailing and though she'd like to try angora, I'm not sure I've ever seen angora felt for sale. Perhaps knitting in angora in very lightweight and then hand felting it down would work - though pure angora is hard to felt in my experience. You can stuff with Kapock, which is also a natural fibre, though with less spring than wool.
those dolls are seriously cute. I use forceps that I bought at a garage sale for stuffing into tight corners, the rounded ends stop you puncturing the fabric.
thank you for sharing your sweet little doll pattern. they are so cute I'll give it a go.
thanks for the tutor, it is very usefull
doll pattern
Post a Comment